

Sugar Cookies
I wanted to share my favourite sugar cookie recipe with you. It’s been my go to for years! Sugar cookies can be hit or miss. But these are definitely a favourite in my family. I’ve also included my icing recipe if you would like to decorate them!
Yields about 20 cookies. (Depends on your cookie cutter size)
Ingredients:
For Cookies:
2½ Cups (390g) all-purpose flour
½ Teaspoon salt
12 Tablespoon (1½ sticks) unsalted butter, at room temperature
1 Cup Sugar
1 egg
1½ Teaspoon vanilla extract
For icing:
2 Cups powdered sugar
1 Teaspoon vanilla
1 Tablespoon of melted butter.
4-6 Tablespoon milk
Instructions:
In a small bowl, whisk together flour and salt. Set aside.
Using anelectric mixer, in a large bowl, beat butter on medium speed until creamy, 2 to 3 minutes.
Add sugar and beat until light and fluffy, about 2 minutes.
Add egg and vanilla. Beat for 1 minute. Reduce mixer speed to low.
Beat in half of flour mixture until it’s almost incorporated.
Add the remaining flour mixture and continue beating until flour is fully incorporated and dough starts to pull away from bowl. (Could take 2-3mins)
Divide and shape dough into 2 equal disks and wrap both of them plastic wrap.
Refrigerate at least 2 hours or for up to 2 days. Remove dough from refrigerator 20 minutes before rolling out.*
Preheat oven to 350. Line baking sheets with parchment paper.
On a lightly floured surface, roll out dough about 1/4 inch thickness.
Cut dough with cookie cutters and space 1 inch apart on sheets.
Bake cookies until golden brown around edges, 10 to 12 minutes.
Let the cookies sit on the baking sheets for about 5 minutes, then transfer cookies to racks and let cool completely.
For icing:
In your stand mixture with the whip attachment, pour in the sugar and butter. Mix for 30 seconds on low.
Then add vanilla and mix for 15 seconds.
Start adding 1 tablespoon of milk and stir. Keep adding 1 tablespoon at time until you reach desired consistency.*
Then ice your cookies.
It’s best to allow the icing to set before eating the cookie (if you can wait lol).
Notes:
-If i’m leaving the cookie dough in the fridge overnight, I find I need to remove the dough from the refrigerator about 40 mins before rolling it out. It just makes the dough easier to roll out
- I typically use 5 tablespoons of milk for the icing. I find it a good consistency to drizzle the icing on top and/or dunk the top of the cookies in the icing.
Cookies will last up to 5 days in a airtight container.
The cookie recipe was developed by Williams Sonoma’s test kitchen.

AI M&M COOKIES
So, I asked an AI for some soft and chewy M&M cookies! It was my first time trying an AI recipe. Well here are my thoughts…
The cookies came together pretty quickly and there was no chilling time which I appreciated. The recipe was easy to follow too. However, I imagined them to spread more and come out flatter. These turned out more thick and cakey. Don’t get me wrong, they were soft but I think they could have been thinner. Flavour wise they were a nice simple M&M cookie, with a subtle vanilla flavour. I even think browning some butter may be a good option to amp up the flavour. If you are looking for a simple cakey texture M&M cookie I would give these a try!
Here is the recipe.
Yields about 10 cookies
Ingredients:
1/2 Cup butter, softened
1/2 Cup packed brown sugar
1/4 Cup white sugar
1 Egg
1 Teaspoon vanilla extract
1 1/4 Cups all-purpose flour
1/2 Teaspoon baking soda
1/4 Teaspoon salt
1 Cup M&M's
Instructions:
1. Preheat oven to 375 degrees
2. In a medium bowl, cream together the butter, brown sugar, and white sugar until smooth. Beat in the egg, then stir in the vanilla.
Combine the flour, baking soda, and salt; stir into the creamed mixture. Mix in the M&M's. Drop by teaspoonfuls onto ungreased cookie sheets. (I lined the baking sheet with parchment paper)
3. Bake for 8 to 10 minutes in the preheated oven. Allow cookies to cool on baking sheet for 5 minutes before transferring to a wire rack to cool completely. Enjoy!

Oreo Cupcakes
Anybody who tries these cupcakes instantly falls in love with them. It’s a simple chocolate cupcake with Oreo cream cheese frosting that never misses.
I highly recommend making the frosting first and letting it sit in the refrigerator while you make the cupcakes. I find putting it in the refrigerator helps with the consistency of the frosting — allowing it to pipe better.
Yields 16 Cupcakes
Ingredients:
Cupcakes:
2 1/4 Cups AP flour
1/2 Cups + 2 Tbsp unsweetened cocoa powder
1 1/2 Teaspoons baking soda
1/4 Teaspoon salt
1/2 Cup butter at room temperature
1 3/4 Cups granulated sugar
2 Teaspoons instant coffee
1 1/4 Teaspoon vanilla extract
3 Eggs at room temperature
1 1/3 Cups hot water
Frosting:
3 Blocks cream cheese (each block is 8 oz)
1 Stick butter at room temperature
1 Teaspoon of vanilla extract
8 Cups of powdered sugar
1/4 Teaspoon of salt
16 Oreos
4 Oreos for topping (optional)
Instructions:
Frosting:
Crush 16 Oreos and set aside.
In an electric mixer with whisk attachment, beat cream cheese and butter until smooth. Add Vanilla.
Slowly add powdered sugar (I recommend a cup at a time).
Add salt and mix .
Lastly, add cookie crumbs and mix until fully incorporated.
Place frosting into refrigerator.
Cupcakes:
Line cupcake tins with cupcake liners. Preheat oven to 350.
In a medium size bowl stir flour, baking soda, and salt until combined. Set aside.
In another bowl whisk together cocoa powder, instant coffee, and hot water. Set aside. (Make sure the cocoa powder is fully dissolved.).
In an electric mixer, cream butter and sugar for 2 minutes.
Add in vanilla. Mix until incorporated.
Add eggs one at a time making sure each one is fully incorporated before adding the next one.
Add half the dry ingredients into the butter mixture. Start mixing. Then add half the hot water mixture then followed by rest of the dry ingredients. Lastly, add the rest of the hot water mixture. Mix until just combined. DO NOT over mix.
Divide the batter evenly into the cupcake tin and bake for 15-20 minutes. Or until a toothpick comes out clean.
Transfer cupcakes to cooling rack. Allow them to completely cool before frosting.
Once cupcakes have cooled it’s time to frost them!
Optional - crush 4 additional Oreos and sprinkle them on top.
Enjoy!
Notes:
When crushing the Oreos for the frosting be mindful of how big your crumbs are. If you using a piping tip that is small, crush cookies accordingly so they won’t get stuck in the tip.
These will keep good in the fridge for up to four days in an airtight container . Take them out of the refrigerator 30 minutes prior to eating.

Mini maple doughnuts
These mini maple doughnuts drizzled in chocolate are easy to make as there is no frying involved. The glaze is the perfect amount of sweetness and just the right amount of maple. Adding the drizzled chocolate on top brings it all together. The doughnuts are soft and cakey and will be gone in minutes haha!
Yields about 15.
Ingredients:
Doughnuts:
1 Cup AP flour
1 Teaspoon baking powder
¼ Teaspoon baking soda
1 Teaspoon ground cinnamon
½ Teaspoon nutmeg
¼ Teaspoon salt
2 Tablespoon unsalted butter, melted and slightly cooled.
1 Egg at room temperature
1/3 Cup light brown sugar
¼ Cup milk at room temperature
¼ cup sour cream at room temperature
2 ½ Teaspoon pure maple syrup
½ Teaspoon vanilla extract
Glaze:
¼ Cup unsalted butter
½ Cup light brown sugar
3 Tablespoon milk
1 Tablespoon corn syrup
¼ Cup + 1 Tablespoon pure maple syrup
2 Cups powdered sugar (sifted)
Chocolate drizzle:
About ¼ Cupmelting chocolate
Equipment:
Mini size doughnut pan
Large zip lock bag
Instructions:
Doughnuts:
1. Preheat oven to 350. Spray pan with non-stick spray. Set aside.
2. In a large bowl, whisk flour, baking powder, baking soda, cinnamon, nutmeg, and salt. Set aside.
3. In a medium size bowl, whisk melted butter, brown sugar, milk, sour cream, egg, maple syrup and vanilla.
4. Pour the wet ingredients into the dry ingredients. Stir and fold the ingredients until just combined. Do not over mix!
5. Put batter into zip lock bag, cut a corner off the bottom of the bag and pipe batter into each doughnut cup. Fill each up halfway.
6. Bake donuts for 7-9 mins or until lightly brown. You can carefully pat the doughnuts with your finger. If it bounces back they are done. Allow them to set in the pan for a few moments. Then transfer to a cooling rack. Allow doughnuts to cool for 2-3 minutes before icing them.
Maple Glaze:
1. On medium heat, melt butter in a saucepan. Then add brown sugar, milk, corn syrup, and maple syrup. Stir often and allow it to come to a simmer. Keep it simmering for two minutes while stirring frequently.
2. Turn off the heat and add powdered sugar. Stir until smooth.
3. Dip doughnuts into the glaze.
Chocolate Drizzle:
1. Place melting chocolate into a microwave safe bowl. Melt in 10 second intervals stirring after each interval until melted.
2. After you have glazed the doughnuts with the maple glaze allow them to sit for about 2-3 minutes and then drizzle the chocolate on top.
3. Enjoy!
Notes:
The batter will be thick, so you may need to use your fingers to even the batter out in each doughnut cup.
These doughnuts are best to eat immediately, but they can be stored in an airtight container for up to 2 days.

Oreo Ice Cream

This is the consistency of the cream mixture.
Another image of the cream mixture consistency.

My ice cream before adding extra Oreos on top and placing in the freezer.

Ready to enjoy!
Ingredients:
About 25 Oreos (It really depends if you want more or less. I find this to be the perfect amount)
1 Can (300ml) sweetened condensed milk
2 Cups Whipping cream
1/2 Teaspoon Vanilla
Instructions:
Line a 9 x 5 baking tin with parchment paper.
Place Oreos in a large ziplock bag and crush them with a rolling pin. (It is up to you how crushed you would like them. You can do bigger chucks or smaller pieces.)
In a stand mixer with the whip attachment whip the cream, condensed milk, and vanilla on medium-high speed for about 5 minutes. Up the speed to high for an additional 1 minute. The mixture should be thick, creamy, and stiff peaks should form.
Add crushed Oreos to cream mixture and stir until well incorporated.
Place the cream mixture into the tin and cover well with plastic wrap.
Place in freezer for 7-9hours or overnight.
Enjoy!
Note: You can sprinkle extra Oreos on top before freezing.

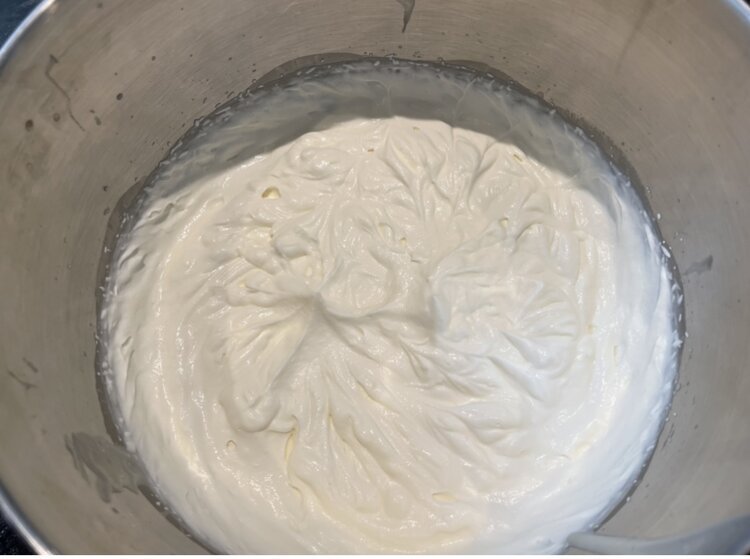
Pound Cake
This Pound Cake has the perfect amount of butter, sweetness, and richness. It’s super easy to make and everyone will love it!
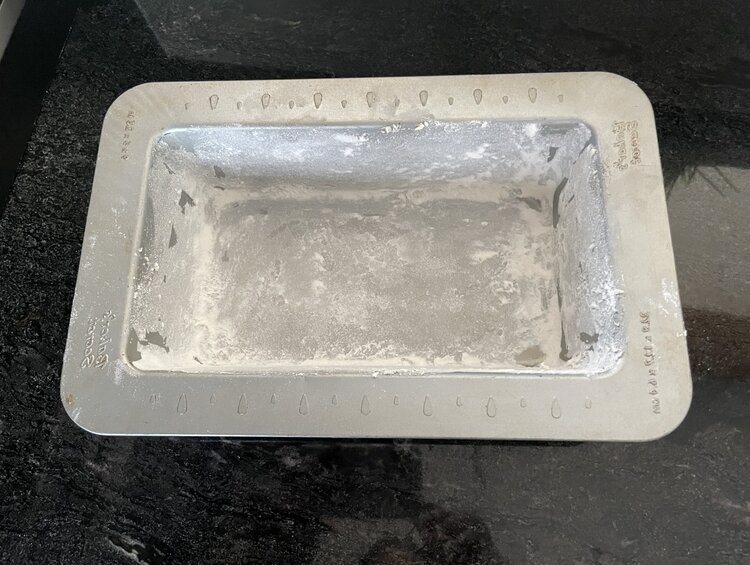
Baking tin buttered and floured.
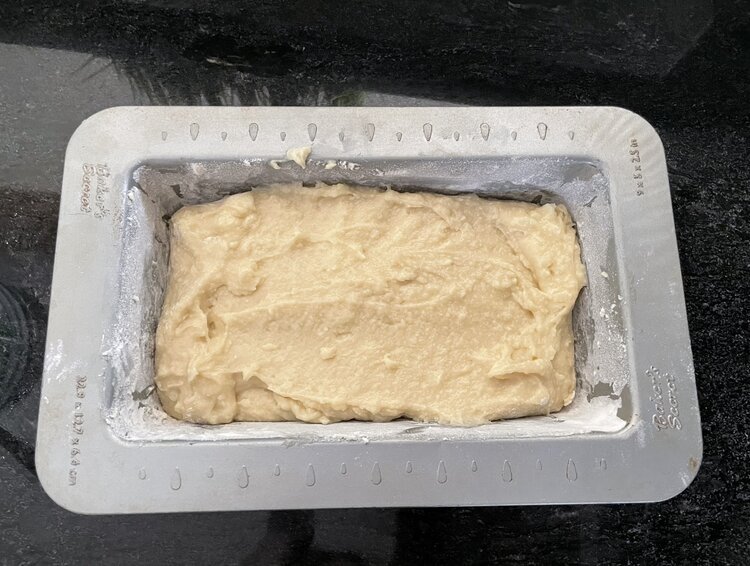
My pound cake moments before going into the oven.

Fresh out of the oven.
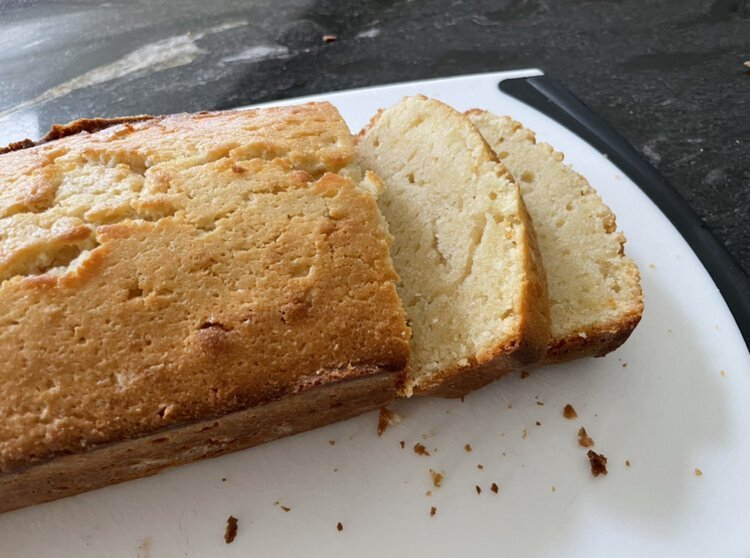
Moments before it was demolished haha!
Ingredients:
1 Cup unsalted butter at room temperature
1 Cup sugar
4 eggs at room temperature
1 1/2 Cup AP flour
1/2 Tsp baking powder
1 Tsp Sea Salt
1 1/2 Tbsp vanilla
1/2 Cup sour cream
Instructions:
1. Preheat oven to 350. Butter and flour a 9x5 baking tin.
2. In a stand mixer with a whip attachment cream butter and sugar on medium speed until light and fluffy. (Can take up to 10 mins).
3. In a medium size bowl whisk flour, salt, and baking powder. Set aside.
4. Add eggs one at a time to the butter mixture while mixing at medium speed. Mix until fully incorporated
5. Add vanilla and sour cream to the butter-egg mixture and mix until incorporated . Then add the flour mixture and mix until just combined. You can use your spatula after to mix any little bits of butter and flour that didn’t get incorporated properly.
6. Transfer your batter into your baking tin and even out batter with spatula. Bake for 50 mins or until the top is golden brown. Don’t over bake.
7. Cool in baking pan for 10 mins before transferring to cooling rack.
8. Enjoy!
Notes:
1. To butter and flour the tin; start by greasing the tin with butter as you typically would and then add about 1/4 cup of flour to the tin. Tip the tin all around. Allowing the flour to move and coat the tin. Once the flour has coated the tin you can spill the excess flour (if any).
2. Once the batter is made, the batter might seem grainy. That is okay! Mine did that too and it turned out fine!
3. Store in an airtight container at room temperature for up to 3 days.

Christmas Tree Brownies
Okay, I don’t think I have found a brownie recipe that has topped this one yet. These brownies are chocolatey and a gooey goodness! And decorating these into Christmas trees is a such a great way to give a festive twist on a classic treat!
Ingredients:
1 Cup + 2 tbsp butter
2 1/4 Cup sugar
5 Eggs at room temperature
1/2 Tbsp vanilla extract
3/4 Cup +1 Tbsp AP flour
3/4 Cup + 1 Tbsp cocoa powder
1/4 Tbsp salt
1/2 Cup semi-sweet chocolate chips
3/4 Cup chopped walnuts (optional)
For Buttercream:
1 stick (1/2 cup) butter at room temperature
1 Tsp vanila extract
1 Cup powdered sugar
1-3 Tsp milk*
Instructions:
Preheat oven to 350. Line 9x13 pan with wax paper.
In a heavy saucepan on LOW heat melt butter and sugar. Stirring often until butter is fully melted. Let the mixture cool for about 10 mins.
Add eggs into butter mixture one at a time. Mix well and fast so the eggs don’t cook.
Mix in vanilla extract.
Sift dry ingredients together and then add to the wet ingredients. Stir until just combined. (You don’t want to over mix)
Fold in chocolate chips and walnuts.
Pour on to pan and spread evenly. Bake for 35 mins. Don’t over bake.
Let the brownies cool in pan for 10 minutes then turn onto a cutting board and peel the paper off and let the brownies cool completely.
Using a tree cookie cutter, cut brownies and place on to a tray to decorate.
Vanilla Buttercream:
Cream butter and vanilla together with whisk attachment until smooth.
Add in powdered sugar and whisk until smooth.
Add 1 teaspoon of milk until you reach desired consistently.
Add in 2-4 drops of food colouring or until you reach desired colour.
Place into a pipping bag and cut off a tiny bit of the end of the pipping bag
Decoration:
You can get creative with this and decorate however you want!
But here is the steps to decorate them like I did:
Start from the bottom of the tree, and gently squeeze the icing out of the bag. Moving in a zigzag as you go up the tree.
Then add your sprinkles on top!
Ta-da! You’re done!
These will be good for up to 5 days in a airtight container at room temperature.
Notes:
If you don’t have a tree cookie cutter you can use a knife and cut the brownies into triangles.
If you don’t have a pipping bag you can use a large zip lock bag instead to decorate with.
This brownie recipe was adapted from Rodelle.
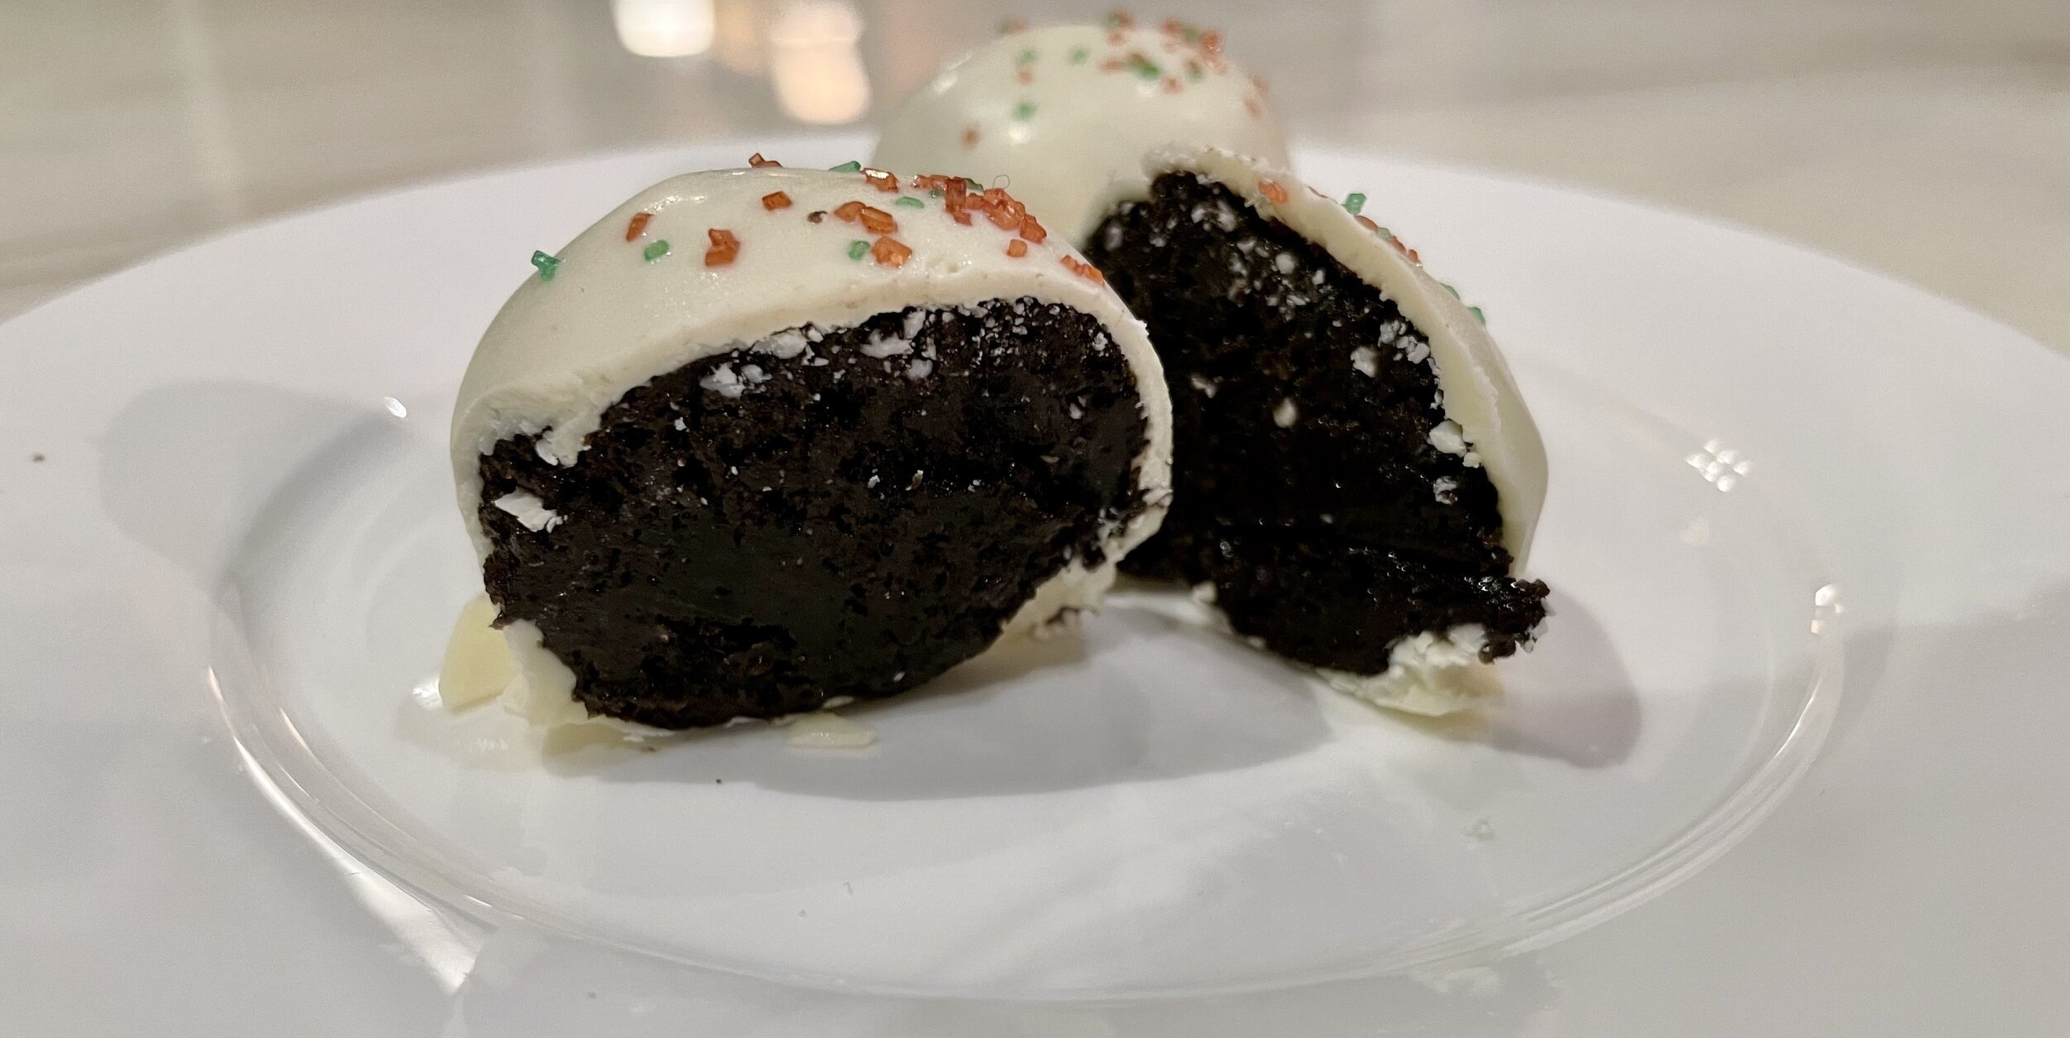
Oreo Truffles
If you are an Oreo lover there is no doubt that you won’t love these! You can never go wrong with Oreos and cream cheese when it comes to making an Oreo dessert. These truffles are truly the perfect amount of richness and chocolatey goodness. The white chocolate really ties everything in together so well.
Ingredients:
36 Oreos - 12oz package
1 Block (8oz) Cream cheese at room temperature.
1 Tsp vanilla extract
2 Cups white melting Chocolate wafers
Sprinkles
Instructions:
In a food processor crush Oreos until it’s a fine crumb.
Cream the cream cheese and vanilla together with the whip attachment. Once smooth add the Oreos to the cream cheese mixture and mix until well combined.
Line a baking sheet with parchment paper.
With a cookie scooper form the mixture into small balls and place in the freezer for 20 mins.
Melt the white chocolate in the microwave in 15 second intervals stirring between each interval until melted.
Dip the Oreo balls into the white chocolate until well coated and place back on the parchment paper. Immediately add the sprinkles
Let the chocolate completely harden before eating.
They will last up to 5 days in an airtight container. You can place them in the fridge and take them out 15-20mins before eating.

Chocolate Walnut Fudge
Every year my mom makes this fudge. But this year I decided to try and make it myself! It was really quick and easy to make. It’s like the perfect amount of richness and sweetness that you could ask for in a fudge.
Ingredients:
3 Cups semi-sweet chocolate chips
1 Can (300ml) sweetened condensed milk
2 Tsp vanilla extract
1 Cup chopped walnuts*
Instructions:
Preheat oven to 350. And place walnuts on a sheet pan and toast for 10 minutes or until they are turning brown and are fragrant.
Line an 8” square pan with parchment or wax paper and set aside.
On medium heat, in a heavy bottom pot, melt chocolate chips and condensed milk. Stirring often.
Remove from heat and stir in vanilla. Then stir in walnuts.
Spread evenly on to the pan and refrigerate for 4 hours or until firm.
Remove from pan and peel off paper. Cut into squares
Enjoy!
These will stay good for up to 5 days in a airtight container at room temperature or you can put them in the fridge.
Notes:
You can also set aside 1/4 cup of walnuts to sprinkle on top of the fudge before placing in the fridge. Just be sure the press the walnuts into the fudge a little bit so they don’t fall off when ready to cut.

Coconut Macaroons
These coconut macaroons are super easy to make and are so so good! —These aren’t nearly as difficult as making Macarons!
Yields about 20 macaroons
Ingredients:
2-2 1/2 Cups unsweetened shredded coconut*
1 Can (300ml) sweetened condensed milk
1 Tsp vanilla Extract
2 Large egg whites at room temperature
1/4 Tsp salt
1/2 Cup melting chocolate wafers
Instructions:
Preheat oven to 325. Line baking tray with parchment paper.
In a large bowl combine coconut, condensed milk, and vanilla, mix until fully incorporated.
Use an electric mixer with whisk attachment, whip egg whites and salt on high speed until medium peaks form. Then fold the egg whites into the coconut mixture.
Using an ice cream scoop or a tablespoon, drop batter on to the baking tray. Bake for 25-30mins and cool completely.
In a microwave safe bowl, melt chocolate in 15 second intervals, stirring between each interval until melted.
Drizzle chocolate on top of the macaroons. Let the chocolate harden and enjoy!
These will keep good for up to a week in an airtight container at room temperature.
Notes*
When dropping the batter on to the tray if you realize the batter isn’t holding its shape you can either add half a cup of shredded coconut at a time to the bowl and mix again. And see if it holds in shape better. If not keep adding about half a cup of coconut until the batter is able to hold its shape, once put on the tray. I also found letting the batter sit for about 30 mins at room temperature helped the batter hold it’s shape better. — As the coconut absorbed the extra condensed milk.

7 Layer BAR
These 7 layer bars are really easy to make when in a hurry and everyone will love them! Yes… we are counting the butter as a layer even if it is a thin layer. I have been making these for many years now and each year they are a hit!
Yields about 25 bars.
Ingredients:
1/2 Cup of butter
9 Graham crackers crushed (9 full pieces. The full graham cracker before you break it half to typically get two pieces)
1 Cup semi-sweet chocolate chips
1 Cup butterscotch Chips
1 Cup shredded coconut
1 Cup chopped walnuts
1 Can (300ml) of sweetened condensed milk
Instructions:
Preheat oven to 350.
Melt butter and pour evenly into a 9x13 pan. Spread graham cracker crumbs over the butter, then evenly spread butterscotch and chocolate chips. Then sprinkle the coconut and walnuts on top. Lastly, pour the condensed milk over the top covering everything as evenly as possible.
Bake for 25-30 mins or until edges are golden brown.
Cool COMPLETELY and cut into squares
Enjoy!
Store in a airtight container for up to a week at room temperature.

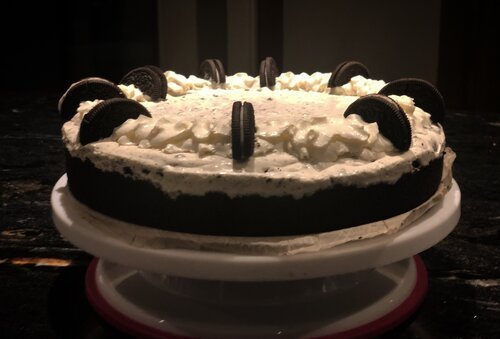
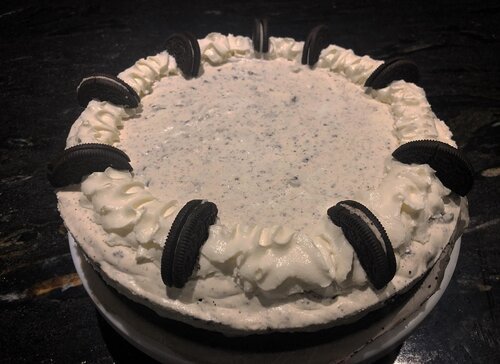
No Bake Oreo Cheesecake
This No Bake Oreo Cheesecake AKA Vancouver Cheesecake is light and fluffy and the perfect amount of sweetness! I can’t wait…
This No Bake Oreo Cheesecake AKA Vancouver Cheesecake is light and fluffy and the perfect amount of sweetness! I can’t wait for you to try it yourself.

Ingredients:
1/4 Cup melted butter
50 Oreos (2 303g Packages)
1/2 Cup white Chocolate Chips
24 OZ Cream Cheese (3 blocks) room temperature
1 1/4 Cups whipping cream
Instructions:
Line 9” Springform pan with parchment paper.
Combine melted butter and 1 package of Oreos in a food processor. Process until are cookies are completely crushed down.
Press into a pan and about 1/2” up the sides.
In a medium microwave safe bowl combine chocolate and cream and microwave in 20 second intervals, stirring well each time, until melted and smooth.
In a large stand mixer beat cream cheese smooth. Then add Powered sugar and half of the melted chocolate chip mixture (give the mixture a stir if it has a yellow film on the top). Mix until well incorporated then add the other half and whip on high speed for about 10-12 mins.
Reserve 5 Oreos for garnish. Place the remaining Oreos into a large zip lock bag. Crush with a rolling pin. You want bigger pieces for the filling. Not like how finely crushed the Oreos were for the crust.
Fold the Oreos into the cream cheese mixture and pour on to crust and spread it out.
Chill for 6hrs or overnight.
Top with whip cream and Oreos.
Enjoy!
This recipe was adapted from: The Recipe Rebel
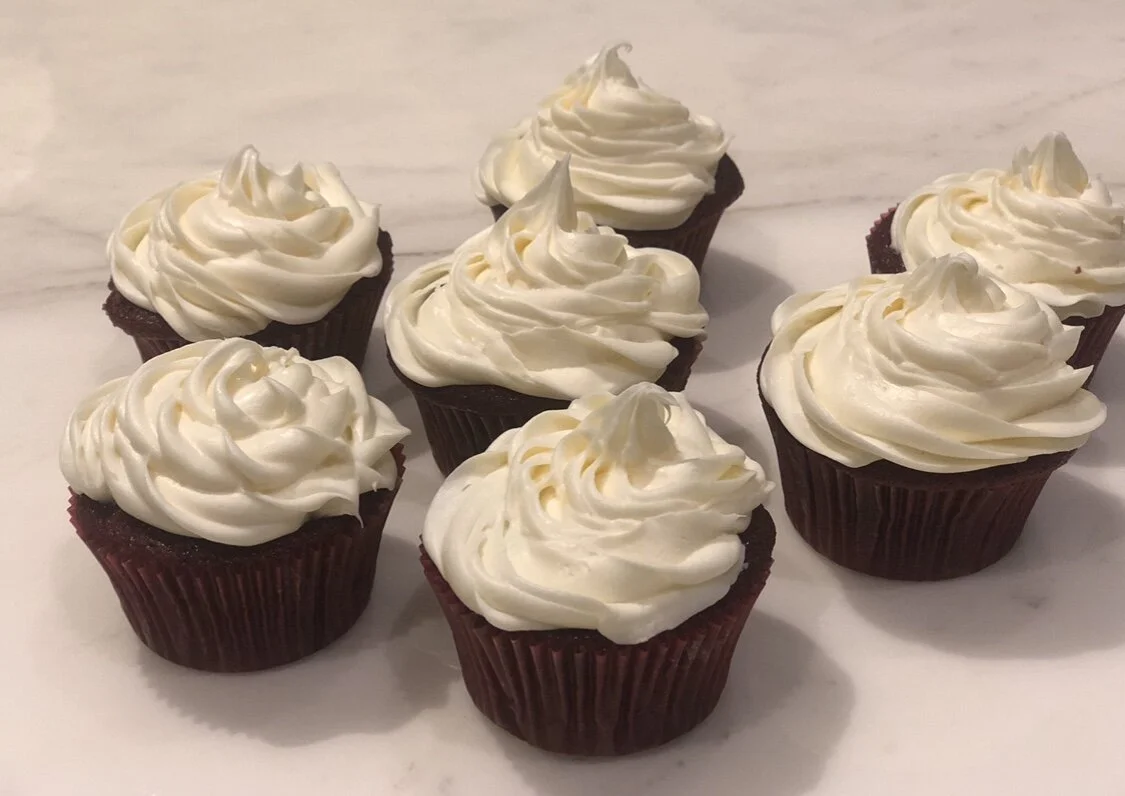
Classic Red Velvet Cupcakes
If you are looking for a Classic Red Velvet Cupcake you are in the right place! They are super easy to whip up and…
If you are looking for a Classic Red Velvet Cupcake you are in the right place! They are super easy to whip up and enjoy anytime of the year. They are moist and have have the perfect about of cream cheese frosting.
Ingredients:
1 Stick unsalted butter - melted.
3 Tablespoon canola oil
2 Teaspoons vanilla extract
1 Cup granulated sugar
2 Eggs and 1 egg yolk at room temperature
1 Cup AP flour
1/4 Cup cornstarch
2 1/2 Tablespoons cocoa powder
1/2 Teaspoon baking soda
1 Teaspoon baking powder
1/2 Teaspoon salt
1 Teaspoon apple cider vinegar
1/2 Cup buttermilk
1/2 Cup sour cream
1-2 Tablespoons of red food coloring (or as much or as little as you like)
For Frosting:
12oz Cream Cheese (1.5 blocks) at room temperature
3 tablespoons unsalted butter at room temperature
2 teaspoon vanilla extract
2 Cups sifted powdered sugar
Instructions:
Preheat oven to 350. Line cupcake tin and set aside.
Melt butter in 30 seconds increments. Stir after each 30 seconds. Add in oil and vanilla whisk until smooth. Whisk sugar until well incorporated. Add eggs and yolk, beat well. In a separate bowl whisk flour, cornstarch, cocoa powder, baking soda, baking powder, and salt. Then add the flour mixture to the wet mixture. Stir until just combined. BE CAREFUL not to over mix.
Whisk in apple cider vinegar and buttermilk until smooth. Fold in the sour cream. Lastly, stir in food colouring.
Divide the batter into the cupcake liners. About 3/4 of the way. Bake for about 15-17 minutes.
For frosting:
In a stand mixer beat cream cheese, butter and vanilla on medium- high speed until smooth
Add in Sugar and salt whip for 2 minutes. Scraping the bowl occasionally and then whip again for another 2 minutes. Pipe on to cupcakes.
Enjoy!
Cupcakes are good up to 3 days in an airtight container in a refrigerator. (I would recommend talking them out of the refrigerator 30 minutes prior to eating.)

Strawberry Scones With a Vanilla Glaze
These strawberry scones can brighten up anybodies day. I usually like english scones with some clotted cream and jam…
These strawberry scones can brighten up anybodies day. I usually like english scones with some clotted cream and jam. I was never a fan of scones with fruit in them. BUT these are the only exception! They are the perfect amount of sweetness and softness.

Here’s what it should look like once you incorporate the butter
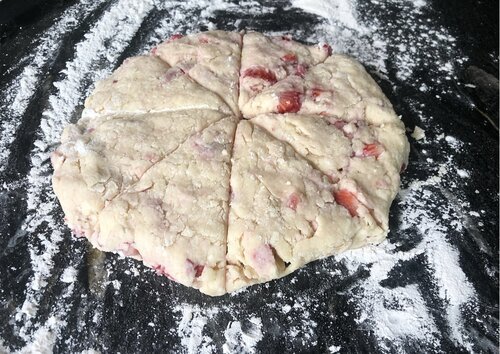
The dough cut into 8 triangles

The scones just before going into the oven
Here’s what you’ll need:
2 Cups AP Flour
1/4 Teaspoon baking soda
1 Teaspoon baking powder
1/2 Teaspoon salt
1/3 Cup sugar
1 Stick COLD unsalted butter (1/2 cup)
1/2 Cup Sour cream
1 Large egg
1 heaping cup fresh chopped strawberries
For Vanilla Glaze (optional)
1/2 Cup icing sugar
1-2 Tablespoon milk (a few more tablespoons may be needed)
1/4 teaspoon vanilla extract
Instructions:
Preheat oven to 400 degrees. Line baking sheet with parchment paper.
In a large bowl whisk flour, baking soda, baking powder, salt and sugar.
Grate butter into flour mixture with the large holes of the grater. Once grated, use your hands to work in the butter until it resembles course meal. Then add your strawberries. Try not to stir too much.
In a small bowl, whisk the sour cream and egg until smooth. Using a wooden spoon, gently stir in the egg mixture into the flour mixture until a large clump of dough forms. Use your hands to press the dough and form a ball. The dough will be crumbly at first, but keep pressing and it’ll come together.
Place the dough on a lightly floured surface and pat into a disc about 6 inches wide and about 3/4 inches thick. Flour a sharp knife (be careful). And cut the dough into 8 triangles. Place on baking sheet and bake for 17 minutes or until golden brown. Let scones cool on the baking tray for 10 minutes.
For Vanila glaze:
Add all the ingredients into a small bowl. You may need add a half a tablespoon of milk at a time to get desired consistency.
The scones will be cooling on the baking tray for 10 minutes, So at the last few minutes drizzle the glaze on with a spoon
Enjoy!
Note: These are best to eat within the same day. But you can also refrigerate them to help with freshness for up to 2 days.

Just drizzled in vanilla glaze.

Chocolate Chip Walnut Cookies
Okay, these cookies are next level to say the least. They are thick, chewy, and gooey…
Okay, these cookies are next level to say the least. They are thick, chewy, and gooey…I don’t know about you, but that’s sounds like the perfect type cookie to me. These cookies will have you drooling for more without a doubt.

My cookies before going into the oven.

Cookies freshly out of the oven.
Here’s what you’ll need:
2 sticks of cold butter cubed (1 cup)
1 Cup brown sugar
1/2 Cup sugar
2 Eggs
1/2 Teaspoon vanilla
3 Cups AP flour
1 Teaspoon cornstarch
3/4 Teaspoon baking soda
1 Teaspoon salt
2 Cups semi-sweet chocolate chip
2 Cups chopped walnuts
Makes 15 cookies
Instructions:
1. Preheat oven to 410 degrees.
2. In an electric mixer with a paddle attachment cream butter and sugars.
3. Add eggs one at a time and vanilla, make sure each egg is fully incorporated before adding another.
4. In a medium size bowl whisk flour, cornstarch, baking soda, and salt. Mix until just combined and add half of the flour mixture into the wet ingredients. Once its starts combining, add the other half. BE CAREFUL not to over mix.
5. Stir in walnuts and chocolate chips.
6. Place parchment paper on a cookie sheet. Roll balls of dough about the size pool table ball and place on cookie sheet. About 5-6 cookies will fit on a large cookie sheet.
7. Place them in the oven for 12 minutes or until golden brown.
8. Once out of the oven, leave the cookies on the sheet for about 10 minutes before transferring them to a cooling rack.
—Eating these cookies by themselves are already so good, but I also like to heat mine up and add a scoop of vanilla ice cream.

The Best Ever Churros
We may not be able to go to amusement parks or festivals to eat our favourite treats. So…
We may not be able to go to amusement parks or festivals to eat our favourite treats. So why not bring the sweet treats right to our kitchen? My go to is Churros, I love when fresh and warm. These churros are so good, they have a fluffy inside and crispy outside coated in a cinnamon sugar mix.
Here’s what you’ll need:
4 cups vegetable or canola oil for frying
Churro Dough AKA Pâte à Choux
1 Cup water
1 Cup all purpose flour
3 Eggs
1/2 cup salted butter
1 Teaspoon vanila extract
A dash of salt
Cinnamon Sugar Coating
1/2 Cup sugar
1/2 Teaspoon ground cinnamon
Instructions:
Heat the oil in a large pot to about 350 and 375 degrees
Mix cinnamon sugar together and spread on a large plate. And set aside.
In a large saucepan on medium heat, heat water, vanilla and salt. Once the butter is completely melted and the mixture starts to simmer, remove from heat and stir in the flour with a wooden spoon until thoroughly combined.
Add eggs one at a time, mix the eggs in quickly so the eggs don’t cook.
Transfer the mixture to a large pipping bag with a large star shape tip. ***
Pipe the dough directly into the hot oil using clean scissors to trim to desired length. Only add 2-4 pipped churros in the pot at a time.
With tongs turn the churros around so they get an even cook. The dough will begin to puff and turn golden brown. This can take any where between 2-4 minutes.
Carefully remove the churros from oil and place on a paper towel covered plate for a few minutes.
Roll the churros in your cinnamon sugar mixture.
Enjoy warm.
Note: If you do not have a pipping bag on hand I would recommend putting the dough in a large ziplock bag and cut a little bit off the corner of the bag . Start off by cutting the bag smaller and try pipping it out, then cut it bigger if needed.
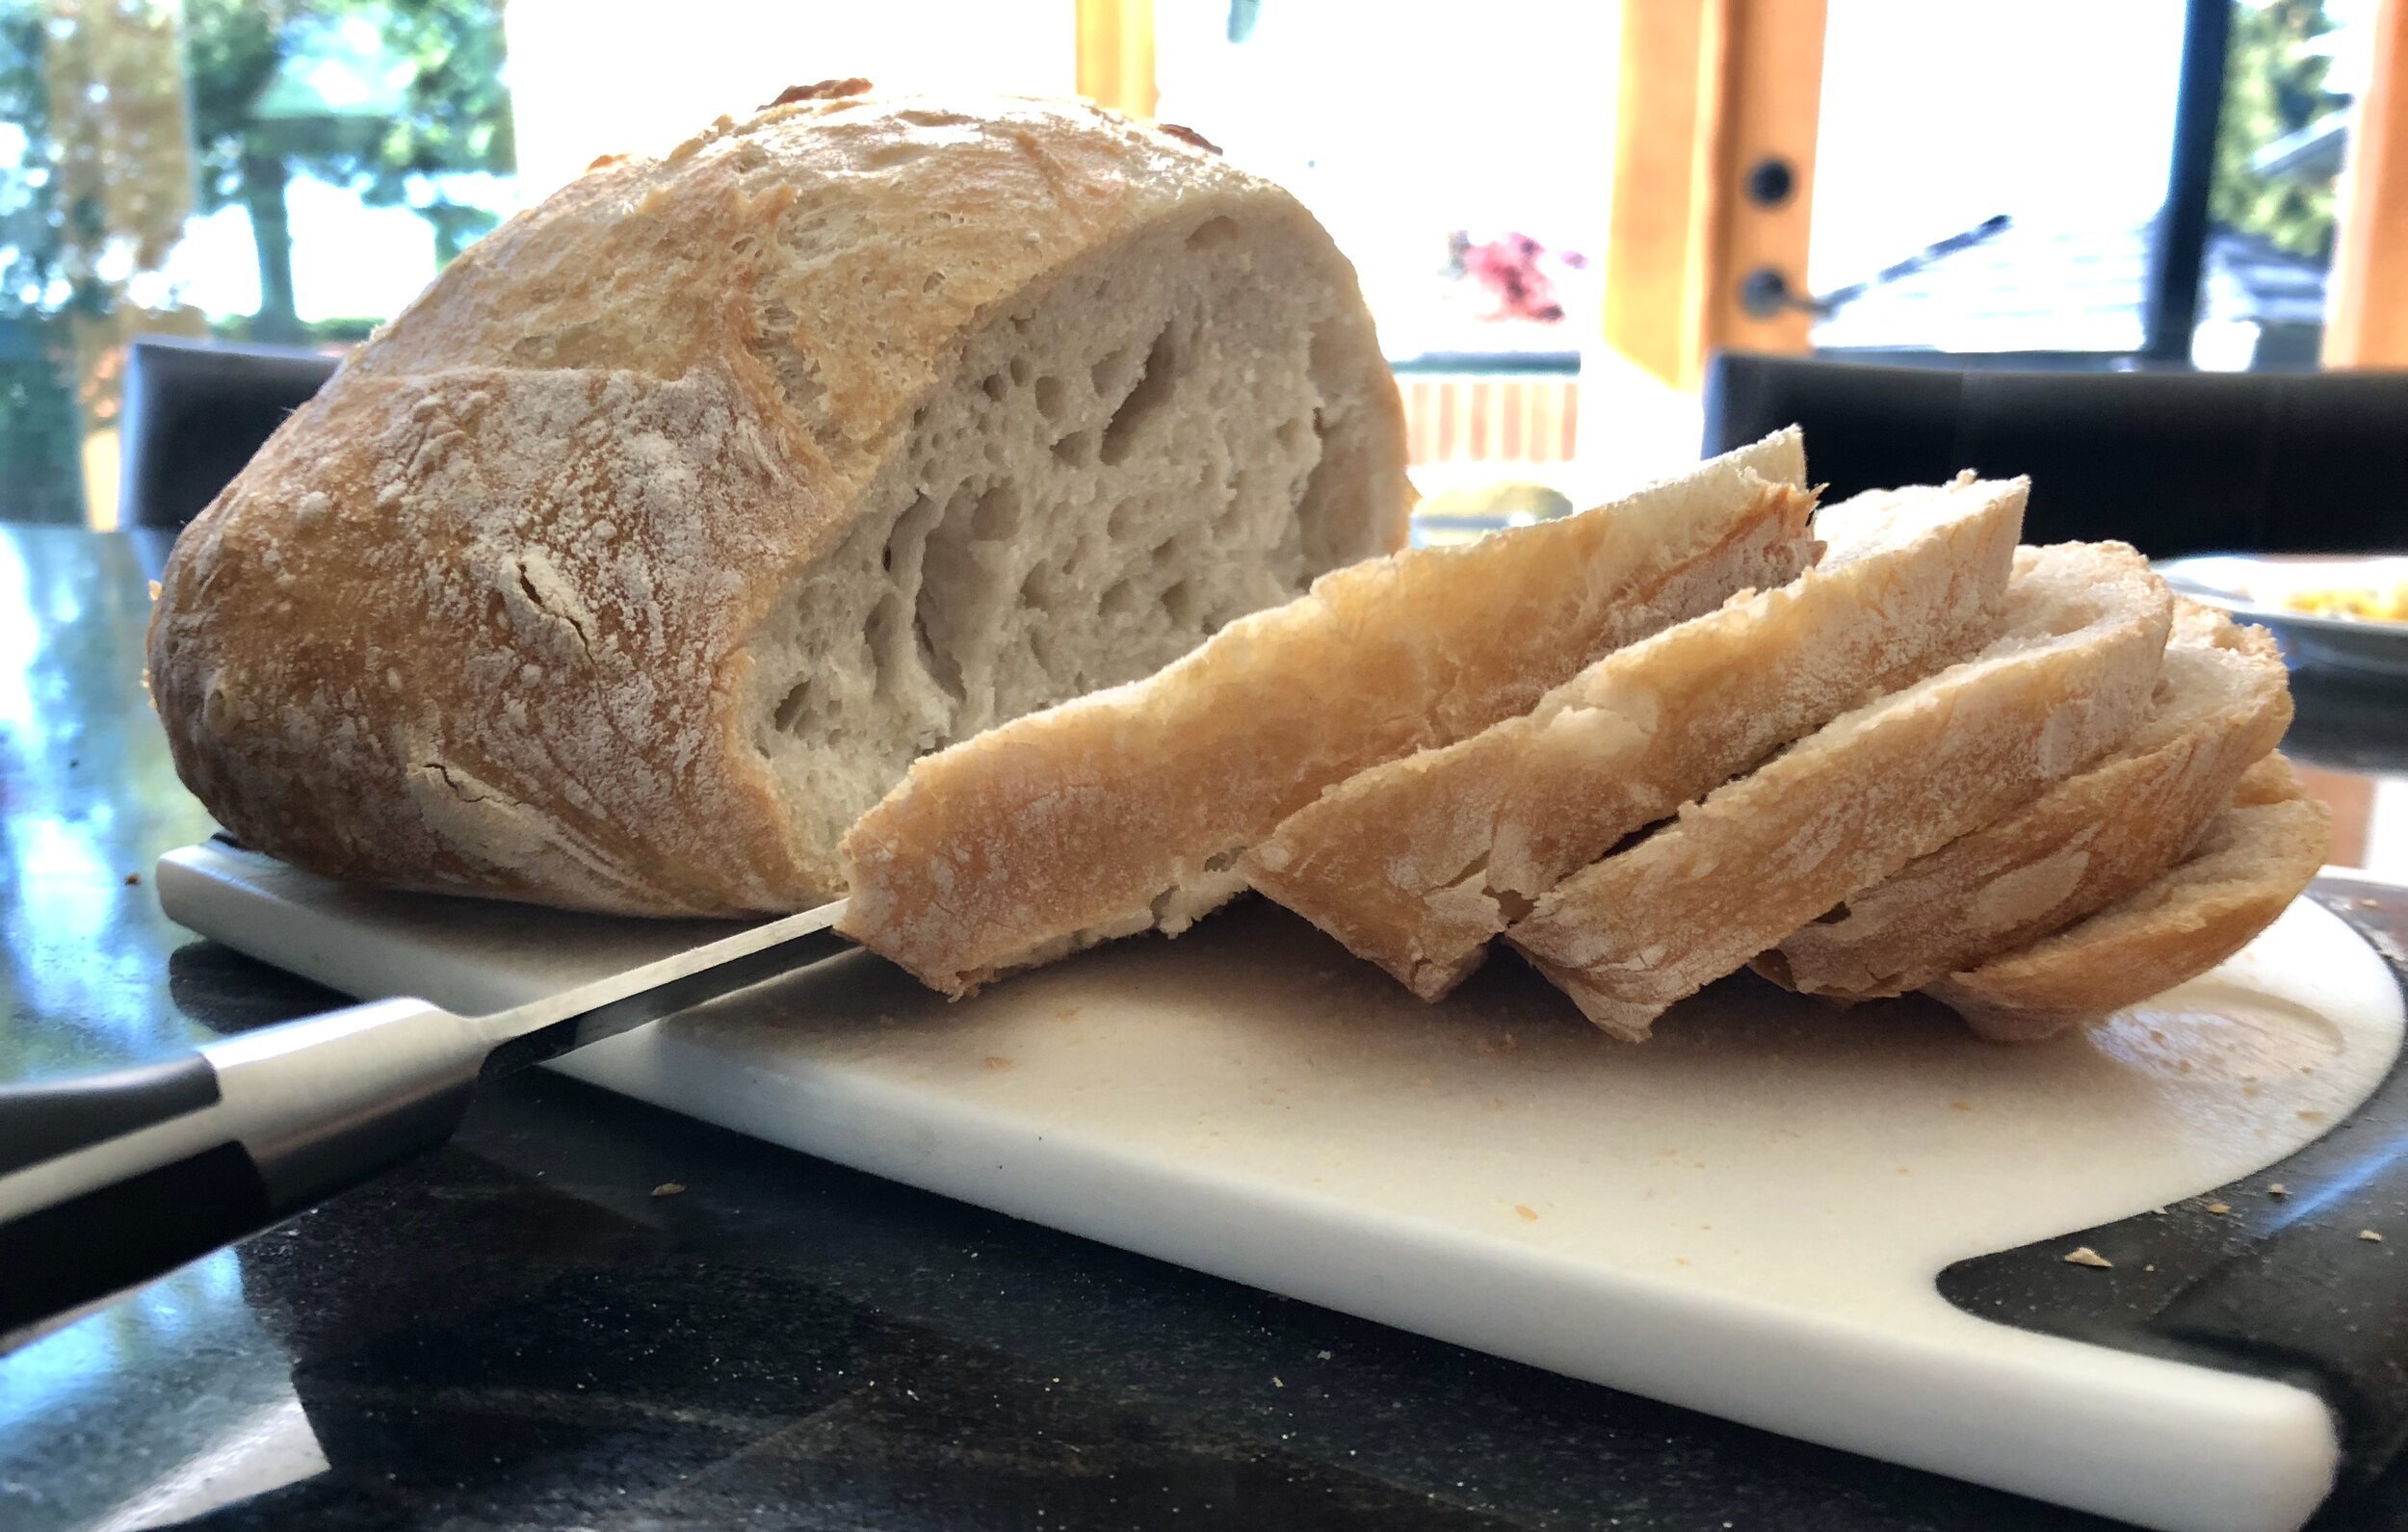
Homemade Artisan Bread
A lot of people are taken back when it comes to making bread. I’m not sure why…
A lot of people are taken back when it comes to making bread. I’m not sure why…
I’m here to tell you that it doesn’t need to be intimidating. Usually, homemade breads only has a hand-full of ingredients and don’t require a lot of experience to make it. The only thing this recipe requires you, is patiences.
My go to bread is this Artisan Bread, it has a crispy crust and a soft, chewy inside. And it’s literally 4 ingredients that you can find right in your kitchen.
Disclaimer: This recipe requires 8-24 hours of rising time. (I make my dough the night before and bake in the morning.)
Let’s bake!
Here’s what you’ll need:
3 cups AP flour
1 teaspoon salt
1/2 teaspoon yeast
1 1/2 cups warm water
Instructions:
In a large size bowl, stir all 4 ingredients until combined. Cover with plastic wrap and rest at room temperature for 8-24 hours.
Take the dough out of the bowl onto a well-floured surface or on parchment paper, and shape into a ball. Let the dough rest for 30 Minutes.
As the dough is resting, place an oven safe baking dish (make sure your dish has a lid) with high sides into the oven and preheat for 450 degrees.
With a knife slash a X on the top of the bread and carefully transfer to the baking dish. If you used parchment paper, you can simply pick it up from the edges of the paper and put the dough and paper into the baking dish.
Cover the dish with your lid and bake for 30 Minutes. Then take the lid off and bake for around 15 minutes or until golden brown.
Let the bread cool before slicing
Enjoy!
Note: It’s best to eat within the same day.